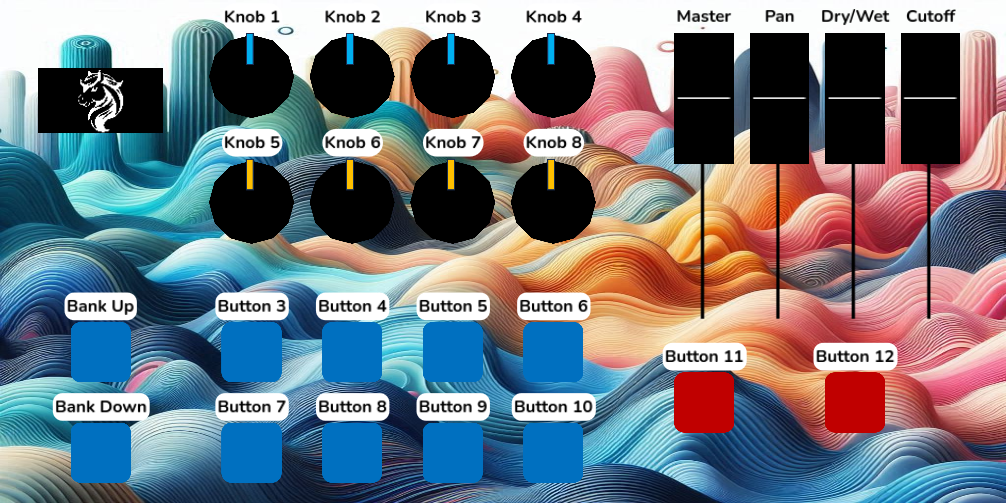

Detailed Usage
[Top]
Below, the detailed usage of the tool and the standard JSON project file will be explained.
Command line arguments
If the program is executed with -h or --help option, the following quick help will be displayed:
  SVGGenerator.exe [OPTION...]

  -j, --json-file arg           Path to the project JSON file
  -o, --output-directory arg    Directory to store the output
  -m, --material-thickness arg  Material thickness in mm
  -b, --box-height-3d arg       Box height in 3D in mm
  -t, --text                    Enable text output of components (default:
                                true)
  -f, --font-size arg           Default font size of component text in px
                                (default: 8)
  -c, --components              Enable component output (default: true)
  -l, --outline                 Enable side outline output (default: true)
  -r, --recess                  Enable recess output for components
  -n, --recess-lines-per-mm arg
                                Recess lines per mm (default: 1)
  -v, --vectorize               Vectorize output (default: true)
  -e, --separate-files          Separate all outputs to their files for
                                easier engraving and cutting
  -k, --keep-files              Keep non-vectorized files
  -z, --outer-sizing            Box sizes are for outside borders (inner
                                area will be smaller)
  -p, --screw-size-top arg      Screw diameter top in mm (default: 0)
  -w, --screw-size-bottom arg   Screw diameter bottom in mm (default: 0)
  -d, --screw-head-diameter arg
                                Screw head diameter in mm (default: 0)
  -x, --screw-extra-margin arg  Screw extra margin in mm (default: 0)
  -s, --simulate                Simulate, do not write any files
  -i, --inkscape-path arg       Inkscape command (default:
                                C:\\Progra~1\\Inkscape\\bin\\inkscape.com)
  -h, --help                    Show this help and quit
Both short and long versions of the arguments can be used.
The arguments -j, -o, -m, and -b are mandatory. Other arguments have default values as mentioned above. To set an argument to false, use the long version and assign the value false. For example, to disable text output, use --text=false. Similarly, for activation od options, which are disabled by default, only use the argument. For example, to enable simulation, use either -s or --simulate. Argument values can be provided with a space or an equal sign if long versions are used. For instance, both --json-file test.json and --json-file=test.json are valid usage. For short versions, only space allowed, e.g., -b 30.
--json-file
A valid path to JSON file to be used as input. Can be a relative path (starting from the working directory) or an absolute path.
--output-directory
The directory to write the output files to. Using . (dot) will use the current working directory. The final files will be written into a new folder having the name of the --json-file.
--material-thickness
This value is used to determine the dimensions of the left, right, front, and bottom sides (if enabled) based on whether the --outer-sizing parameter is active. See Coordinate system and effects of sizing parameters for more info. The value is in millimeters (mm).
--box-height-3d
The height of the box in millimeters (mm). If --outer-sizing is used, this will be the outer height of the box. Otherwise, it is the inner height of the box.
--text
Enables the text output of the components if they have a call_name property. --font-size argument specifies the size of the text. The rotation follows the rotation property of the component. Text rotates only for 0 90 180 270 degrees. Otherwise 0 (zero) is assumed.
Default: true
--font-size
Specifies the font size if the --text output is enabled. The value is in pixels (px). This value is used, if silkscreen_font_size property is not set in the JSON.
Default: 8 px
--components
Enables the component output to cut circles and/or rectangular shapes through the --material-thickness.
Default: true
--outline
Enables the side outline output which draws the sizes of the sides with the given dimensions based on the --outer-sizing property.
Default: true
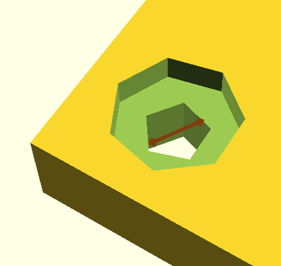
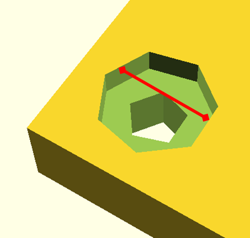
--recess
Enables the recess output of the components. Recesses take the sizing from visible_diameter (priority) or visible_width and visible_height properties. Recesses may be helpful to have slightly lowered shapes to e.g., stabilize or limit the movement of button caps. This value does not change the behavior of the screw head recess (See --screw-head-height).
Default: false
--recess-lines-per-mm
If --recess is used, this argument specifies how many lines per millimeter (mm) should be drawn to create the recesses. This is important to set if the default value is not enough for the laser to create the recess.
This value is used both for —recess and --screw-head-height arguments.
Default: 1 line per mm
--vectorize
Vectorizes the SVG files using Inkscape (needs to be installed separately) in case the laser software is not capable of vectorizing the SVG files. Vectorizing files may take time for each side depending on the number of components on that side.
Default: true
--separate-files
Creates separate SVG files for each enabled output, by splitting them into different layers: --components, --outline, --text, --recess, --screws-* (for top and/or bottom), and --screw-head-diameter (screw head recesses for top and/or bottom). This is useful in case the laser software does not allow selections to specify different engraving/cutting settings. Each file will only contain the relevant layer.
Default: false, one file for each side, all layers merged.
--keep-files
Does not delete non-vectorized SVG files if --vectorize is enabled. An SVG editor can be used to view or modify the output.
Default: false, delete non-vectorized files if vectorization is successful.
--outer-sizing
If used, the sizes defined in the JSON file as well as the --material-thickness and --box-height-3d arguments will be used to create the outer volume with the given dimensions. Otherwise, these values will be used to create the inner volume with the given dimensions.
Default: false, use inner dimensions.
--screw-size-top
Screw hole diameter to be drawn as hole in millimeters (mm) on the top side of the box..
Default: 0 mm, no screws.
--screw-size-bottom
Screw hole diameter to be drawn as hole in millimeters (mm) on the bottom side of the box.
Default: 0 mm, no screws.
--screw-head-diameter
If the screws must be counterbore/recessed, any value given in millimeters (mm) (preferably greater than --screw-size-top or --screw-size-bottom) will create a circular shape to bury the head.
Default: 0 mm, protruding screw head.
Note: Using recess for screws on bottom side requires manual flipping of the surface. --separate-files option may help you to achieve this.
--screw-extra-margin
By default, screws are added at the four corners of the top and/or bottom side of the box, leaving a margin of --material-thickness from the sides. If an additional margin is desired, any value given in millimeters (mm) will increase this gap.
Default: 0 mm, no additional margin.

--simulate
If used, simulates the settings, without writing to actual files.
Default: false, write to actual files.
--inkscape-path
Path to Inkscape binary which is used when --vectorize is enabled (default).
Default: C:\Progra~1\Inkscape\bin\inkscape.com (on Windows)
--help
Shows the quick help with the list of arguments and their short descriptions.
JSON File
See the definition on this page: MIDILLI JSON File Definition.
Typical scenario for separate files
- Engrave text with a lower laser power and/or faster speed,
- Cut components,
- (If exists) Cut screw holes,
- (If exists) Engrave component and/or screw recesses with a power slightly higher than text engraving and slower speed depending on engraving depth/screw head diameter.
- Cut outlines to separate sides from the material
If you are using a laser engraving software similar to LaserGRBL (free and open-source), you can separately append the files one by one with different settings and have all engraving and cutting at once. Similarly, some other engraver software such as MeerK40t (free and open-source) let you also import all files at once and select the items to set different operation for each item.